Shower Tray Repair
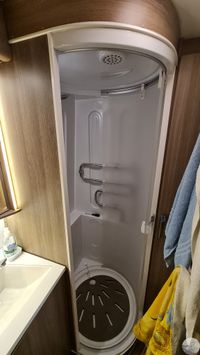
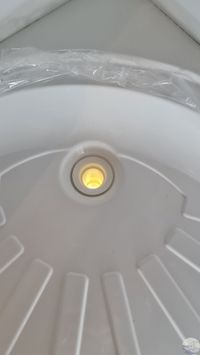
We are proud of the transverse bathroom in our caravan. We use the shower in particular almost every day when we are traveling with the caravan or spending our weekends on the permanent pitch.
The shower tray is made of ABS plastic, the plasticizers of which escape over time. As a result, the elasticity of the material reduces under load. To ensure that the load on the tub is as uniform as possible during the showering process, we always use a wooden panel as an insert.
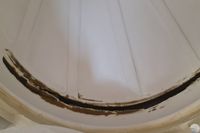
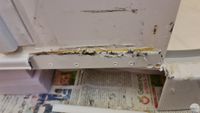
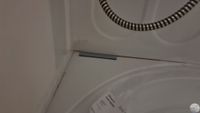
After around six years of intensive use, the shower tray failed and tore open along the edge at the exit to the sliding door.


It was shortly before our next trip, we still had three weeks to repair the tub. There are basically two ways to solve the problem. The more cost-effective way is to laminate the tub without removing it. The cleaner route is to replace the tub and eliminate the cause of the damage.
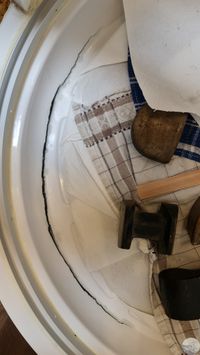
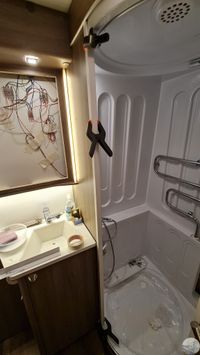
Due to time constraints, all we could do was laminate the tub so that we could use it three weeks later. It was clear that the crack could only have arisen because of a gap underneath the tub. So we first pushed the bottom of the tub down with weights. The resulting gap must now be closed.
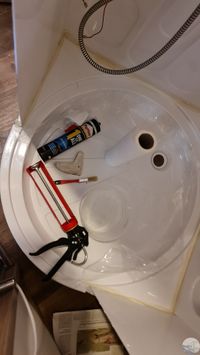
To fill the gap, we use cable ties, which we glue in with superglue that is suitable for ABS. We then fill the transition with a plastic filler that is suitable for ABS and roughly sand the edges away. Since fine dust is created during sanding and contamination can also be expected during further work processes, we covered everything in the bathroom with painter's foil.


The next step is laminating. We use a two-component epoxy resin from the company "HP Textiles" together with fiberglass mats to install a GRP coating in the tub. There are plenty of tips and videos online on how to do this. All materials can be easily ordered online.
The resin itself is transparent. Since the coating will be visible, we ordered white paint to match the resin and mixed it into the resin during processing, color RAL 9003. There are a few special features that must be taken into account when mixing the resin: The processing time after mixing is between 25, depending on the temperature and 30 minutes, and the mixing ratio between resin and hardener must be strictly adhered to so that a correct connection between resin and hardener is created. We therefore bought a precision scale that can resolve down to 0.1g.
The mixture is mixed in plastic cups, which are later disposed of. A wooden spatula as a stirring tool is available as an accessory for little money from “HP Textiles”.
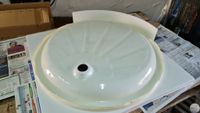
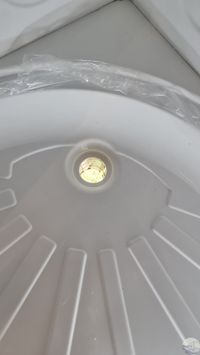
But before we start laminating, the shower tray outlet must first be removed. We then make a template of the shower tray out of cardboard, which we need to cut out three layers of GRP mats. Before we laminate, the cutting must be finished. When laminating, we will create a material thickness of at least 2mm with the 3 layers together so that the tub will be load-bearing. We tape off all edges neatly with painter's tape.


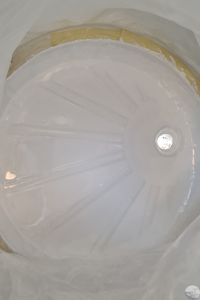
Next, we brush the first layer of synthetic resin onto the first cup, about 200g, into the tub that has previously been sanded and cleaned with abrasive fleece. Time is short at around 25 minutes, so we have to hurry when inserting the first GRP layer. This is carefully placed on the surface using a brush and pressed in by carefully dabbing with the brush. GRP must not protrude anywhere. This takes some practice, we can't do it 100% perfectly. Nevertheless, things have to move on quickly. We mix fresh resin again and apply the next layers. After the third GRP layer, we apply enough resin until the surface appears smooth.
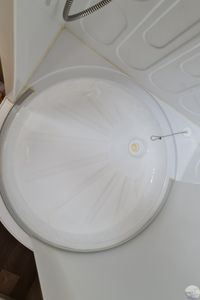
The tub needs at least 24 hours to dry out. The tub is now functionally ready for use and can be used for the upcoming exit. It took us a total of around twenty hours of work to get the tub back into usable condition. However, the execution is simply not clean enough to leave it like that in the long term. Therefore, when we returned, we ordered a new tub and then replaced it.
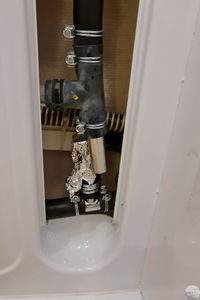
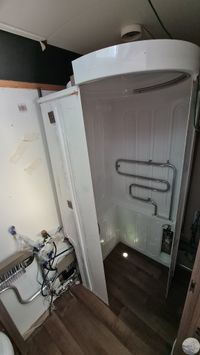
One thing in advance: Replacing the tub was only possible by dismantling the entire bathroom. Our caravan is very elaborately built and we also have a hot water heating pipe integrated into the shower wall that needs to be removed. This means that the heating pipe must be drained and then refilled and vented when reassembled later.
Replacing the shower tray means that everything in the bathroom really has to go. We needed a total of around 100 hours of work to replace the tub. We documented each individual disassembly step with photos, around 400 photos in total, so that reassembly can be carried out again later. It would be bad if there were any parts or screws left over at the end.
After a lot of patience and documentation of all dismantling steps, the shower cubicle was now free. The shower walls are glued and welded together with the cabin top and the tub. Everything is on the tub, which in turn is lined with pink hard foam panels. The challenge now was to remove the old shower tray in such a way that, on the one hand, the new tray can be inserted precisely and, on the other hand, the existing cabin walls are not damaged.


We use a reciprocating saw to separate the tub walls from the old shower pan. The walls are fixed in places with hard adhesive and then completely sealed from the outside with an acrylic adhesive. From the inside, the fillet seams were sealed with silicone. All of this has to be cut away step by step. We carefully cut out the inner fillet seams with a sharp cutter knife. It takes a lot of sensitivity and patience to separate the wall cabin elements from the tub in the narrow work space.
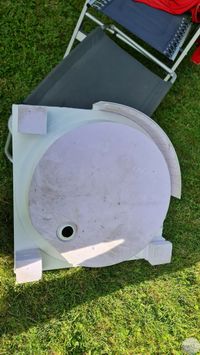
The rigid foam blocks are attached under the old tub with double-sided tape. We carefully remove these because we will need them again later for the new tub.


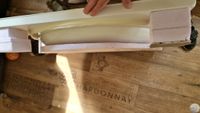
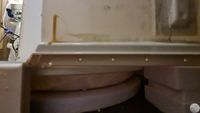
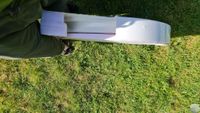
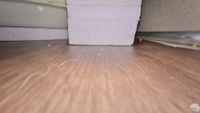
Now it's time to eliminate the cause, the reason why the old tub cracked. We remember that plastic loses its plasticizers over time and becomes brittle. As a result, at some point he will no longer be able to compensate for movements sufficiently. So the cause is that too much movement is possible. In our case, the cause was a gap between the load-bearing floor and the tub support. The photos show this very clearly with the spring angle.
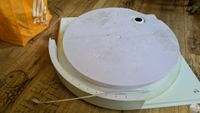
The solution: With the new tub, it must be ensured that there is no longer a gap after the rigid foam base has been installed. On the one hand, in our case, the hard foam under the front curve was about 4mm too high, and on the other hand, the corner blocks were not exactly the same as a base. We have adapted this very precisely so that the error does not occur again. In addition, we have reinforced the new tub on the underside with a GRP coating so that the ABS plastic is relieved in the event of any remaining unevenness. Since it is not a visible area, we saved the white color in the resin.
The new tub is now perfectly prepared. We position them with the assembled hard foam panels and place the shower cubicle top into the tub. U-profiles are attached to the walls as rails for mounting the furniture. So we now align the cabin in the tub using fine wheel chocks so that the cabin is aligned straight on the rails without any tension.
Next, we use door frame clamps to carefully press the cubicle walls in the shower tray. This is necessary to eliminate the gap between the cabin wall and the shower tray and to create a clean bond.
For gluing, we first use a hot glue gun, which we use to secure the cabin's load-bearing fixation in the tub from the outside at the corners of the cabin. We then use cartridges with special adhesive (Pattex One for All) to seal the entire length of the seam from the outside. Using a little water mixed with detergent, we smooth out the seam with our finger.


After the glue has dried out, the shower cubicle is positioned precisely and the bathroom is assembled in reverse order. The photos from the disassembly are the basis for the assembly. All parts are sorted and ready in the correct order and are processed step by step.


Two plastic U-profiles were destroyed during dismantling because they could not be removed without damage due to the bonding. We replace these with plastic angle profiles that we screw together. This way, if necessary, we can carry out dismantling later without causing any damage, should this be necessary.
After successful assembly, we neatly apply all the silicone seams in the cabin and fix the lower sliding door rail, which we previously separated cleanly from the old shower tray.
Finally, we refill the Alde hot water heater, which we emptied before dismantling. It took about two weeks to gradually ventilate the system.