Off-Grid update
We've been diligently traveling the world in our Kabe campervan since 2017. While our basic setup back then included a 150W photovoltaic system for the 12V leisure battery, in 2018 we gradually expanded to a 230V system, which allowed us to operate typical household appliances while off-grid. At its core, we relied on a Victron Multiplus inverter in combination with a Victron solar charge controller and Optima AGM spiral-cell batteries. Details about the system expansion can be found in the "230V Off-Grid" chapter.
We decided against LiFePO4 batteries back then for good reason: firstly, there wasn't enough experience with them in the caravanning world, and secondly, the purchase price was significantly higher than it is today. Now, after almost eight years, our Optima batteries have lost considerable capacity; we're left with only about 30% of their original capacity.
That's reason enough to consider replacing them, and in the process, to check whether switching systems altogether would be worthwhile.
Replacement: What makes sense today?
First, some data on the performance of our overall system so far:
Over the entire operating period, approximately 382 kWh were charged into the AGM batteries. This charge is a mix of the photovoltaic system and grid-connected electricity. In contrast, 213 kWh were discharged. Overall, this means that the Optima AGM spiral cell batteries have had a total efficiency of about 56%. Considering the tried-and-tested AGM technology, this is certainly a very good value, but compared to current LiFePO4 battery systems, it is downright inefficient.
There are several important parameters to consider when choosing a system:
- Costs: While back then the costs for LiFePO4 batteries with comparable usable capacity were about four times higher than for AGM batteries, they have now converged significantly, and the difference is no longer substantial.
- Weight and Size: Our old battery pack weighed about 120 kg with a maximum capacity of 300 Ah, of which only about 150 Ah was usable. After all, it was important to avoid discharging it beyond 50%. A 200 Ah LiFePO4 battery offers comparable performance with 160 Ah of usable capacity, but weighs about 20 kg. The dimensions of a 200 Ah LiFePO4 battery are roughly equivalent to one of the four Optima batteries we have used previously. Switching to LiFePO4 represents a significant saving in weight and space.
- Lifespan: It is estimated that LiFePO4 batteries can withstand about five times as many charge cycles as AGM systems.
- Temperature: AGM batteries can be charged and discharged in both warmer and sub-zero winter temperatures. LiFePO4 batteries, on the other hand, can only be charged at temperatures above 5°C. Only discharging is possible at winter temperatures.
- Charging process: AGM batteries are charged using three charging states: Bulk, Absorption, and Float. Theoretically, they allow charging voltage to be applied at any time, even when fully charged. LiFePO4 batteries, however, only have the Bulk and Absorption charging states. During Absorption, cell voltage equalization takes place. The batteries must not receive any further charging voltage once they are fully charged.
Due to these technical requirements, the demands on the system peripherals differ significantly when comparing AGM and LiFePO4 batteries. LiFePO4 batteries require more complex monitoring and control than AGM batteries, resulting in additional costs.
Our Decision
Based on the arguments mentioned above, we decided to upgrade our system peripherals to LiFePO4. We have a very good foundation with the Victron components we currently use. Therefore, it makes sense to stick with Victron for the new system peripherals.
However, due to space and weight constraints, we decided to increase the total usable capacity. We will therefore draw our power from two Victron batteries, each with a capacity of 200Ah. This gives us a total usable capacity of 320Ah – more than double the previous capacity. Our goal: All the equipment must fit within the existing space.
Currently, the four Optima batteries are mounted in two separate compartments under the bed. In the new installation, the batteries will be installed in the right compartment, while the new control electronics will be installed in the left compartment.
We are purchasing:
- Two Victron 12.8V 200Ah NG batteries
- One Victron VE.Bus BMS NG
- One Victron MK3-USB-C interface
- One Victron Cerbo GX, additionally with a touch display (to be added later)
- Two high-current busbars from Wattstunde
- One fuse holder for and with a 300A T-Cell fuse
- Various cables, high-current cables, and crimp connectors
First steps


We disconnect the old batteries and remove them from their holders. The Multiplus inverter is removed from the cabinet to rewire the RJ45 connectors, adjust the DIP switches, and reprogram the inverter using the MK3 interface, including the necessary software update.
The Multiplus inverter is the central communication interface through which all other devices will later connect and be controlled and regulated by the Cerbo GX control computer.
Installation of the new components


First, we position the new batteries. They are securely fixed using the existing mounting points.
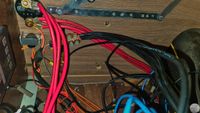
Due to the expected high currents, we use cable cross-sections of at least 70 mm². This is achieved by using either 2 x 35 mm² or 3 x 25 mm² cables per terminal connection. We first connect the terminals of the two batteries together. Our goal is to achieve the best possible balance between the two batteries during operation.
Next, we mount the BMS device and the fuse holder in the front section.


We are now adding the busbars in the lower section and positioning the Cerbo GX control computer above them.
While the 100/30 solar charge controller was mounted on the battery side, the 75/15 solar charge controller is now located next to the Cerbo GX. We are mounting the MK3 interface above the solar charge controller to allow access to all settings for service purposes via USB using a laptop or smartphone.
All devices are connected according to a specific wiring diagram.
The system is now operational


We installed the touchscreen display above the entrance. This places all control panels close together, forming a single, integrated control unit for the entire vehicle.
The display offers various display modes that graphically represent all electrical energy flows. In addition to the battery charge level, it also shows the energy flow from shore power and the photovoltaic system. Furthermore, it displays all power consumption. This allows for monitoring and control of the entire electrical system.
The display is directly connected to the Cerbo GX, the central control computer that manages, controls, and monitors all other connected devices.
What did the upgrade bring us?
In direct comparison to our previous battery pack, we required the same total installation space due to the additional control and wiring equipment, but we saved about 70 kg in weight. In return, the usable capacity more than doubled.
The previous AGM pack would have cost us around €1000, while the new system, including the control electronics, cost about €2800. Converted to a comparable capacity, that would be about €1315. Eight years ago, it would have cost between €3000 and €4000.
Based on the expected fivefold increase in lifespan, that would then be about €265. Overall, that's a significant improvement.
We've been using this new installation reliably and without any problems for several months now. We're very curious to see how the system will perform over the next few years. Initial findings already show a significantly better efficiency of the new battery system compared to the previous AGM pack when comparing charging and discharging currents. The next few years will certainly reveal more details.