Awning construction
We use our caravan in two ways. On the one hand when traveling, and on the other hand on days off at our permanent parking space. First of all, we set up our travel awning here for the entire season. After a few years we decided to build a permanent awning so that we
- didn't have to constantly dismantle the awning when traveling and then put it back on later,
- do not wear out the travel tent unnecessarily,
- can use the space comfortably even in the cold season,
- can also store our camping utensils protected on the site in winter.
Features
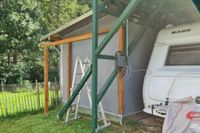
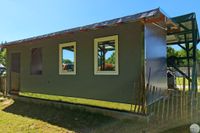
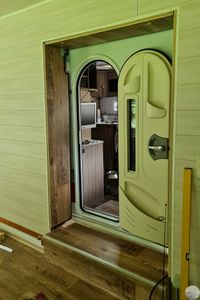
The awning should form a unit with the caravan roof. Sufficient thermal insulation is required so that the awning can be heated with a petroleum stove even in winter. A simple electrical installation for lighting and sockets is a given. The connection to the caravan should be ensured using a robust yet easy-to-dismantle lock. A large sliding door to close the awning during our trips is mandatory. Access to the toilet cassette and the hydraulic lifting system on the right axle side of the caravan is required for easy service.
Start of building
Our construction time is around three months for the fixed awning. A little later we will need about 2 weeks for the flanged tool shed. The total cost is around €8,000 for the material. There are no labor costs because we do everything ourselves.
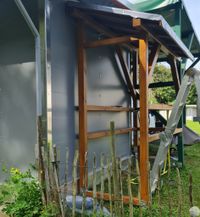
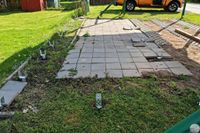
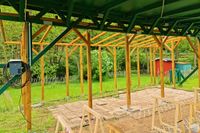
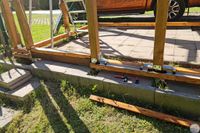
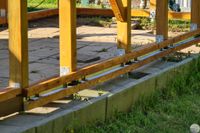
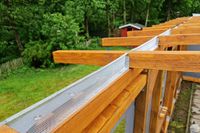
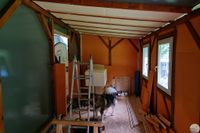
After prior planning and construction, we first dismantle the travel tent, measure the terrain thoroughly and prepare seventeen screw-in anchors on which the awning will later stand. These are screwed into the ground about 80cm deep and are each designed for a load capacity of up to 10t. The anchors are intended for 9cm squared timber, which we will later use as a supporting framework.
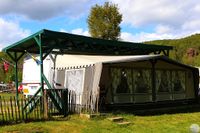
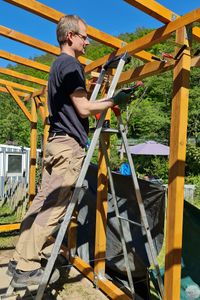
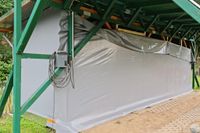
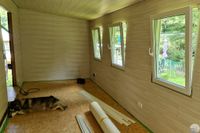
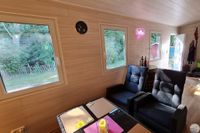
We put the front door and 3 windows facing the garden area with a view of the river. A pent roof is provided and is stretched with 6x8cm rafters as a support. The awning is set up on an area of 3m x 8m.


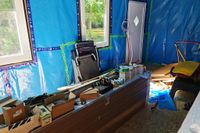
The later weather protection cover is a heavy truck tarpaulin that is not breathable. In order to avoid moisture damage to the wall construction and the interior, good ventilation of the tarpaulin is required in addition to insulation and a vapor barrier. We install expanded metal on the wall elements and at the joints towards the roof, a fine mesh that allows ventilation but keeps insects away. This means that the walls remain well ventilated from the inside and free of vermin. We first stretch the tarpaulin on the three outer sides of the wall.

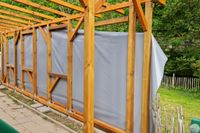
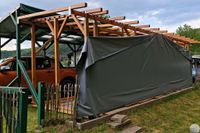


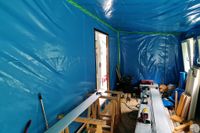
The tarpaulin is tensioned and fastened to the beam frame with plumber screws. After the wall tarpaulins are installed, the roof tarpaulin is pulled up, tensioned and secured with plumber screws. The tarpaulins for the window and door openings are then folded around the respective beam frame and secured. This is followed by aluminum sheets for a clean finish on the wall corners, roof and floor.


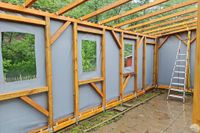
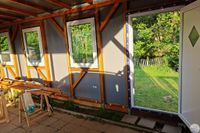
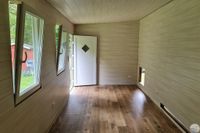
The three triple-glazed windows and doors are installed. A special sealing tape is used to ensure insulation and windproofness. The tape swells many times over after just a short time and seals everything cleanly. The rear wall is then prepared in the raw frame for the service flaps and then covered with the truck tarpaulin.
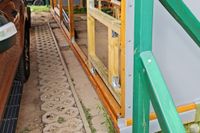


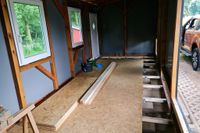
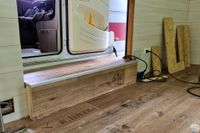
We are now laying the floor using the sandwich method. To do this, we start with the beam supports, which are installed at a sufficient distance from the ground. This ensures that there is sufficient ventilation under the awning.
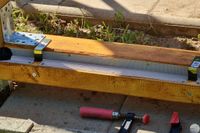
The first supporting layer, 18mm thick OSB panels, is screwed onto the beams. This is followed by rigid foam board insulation and the laying of cables and empty pipes for the electrical installation. Finally, there is another layer of OSB boards that are screwed tightly together.

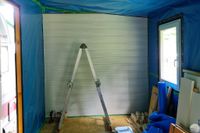
The next work is to be done: the insulation of the walls and ceiling. To do this, a small 15mm square wooden strip is screwed onto all beams directly from the inside of the tarpaulin. The 40mm thick hard foam board is then placed on this and bordered on the other side with additional wooden square strips. This ensures that a 15mm wide air shaft between the tarpaulin and the insulation board ensures sufficient ventilation of the wall and roof tarpaulin.
Now the vapor barrier is installed. All overlaps of the film must be carefully masked with vapor barrier tape.
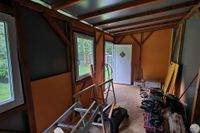

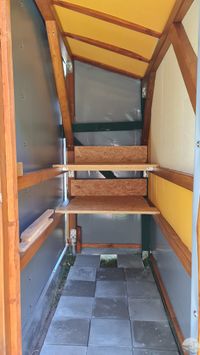
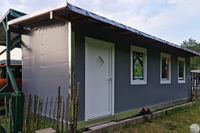
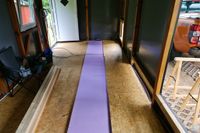
Now come the interior panels on the wall and ceiling. We use wet room panels because the room is not heated throughout. During installation, the boxes for switches and sockets are also placed. We install end brackets on the wall and ceiling and lay an attractive and durable floor covering with skirting boards. We then make the flaps for access to the axle and the toilet cassette.

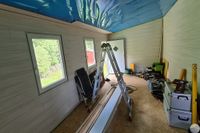

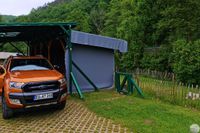
Now comes the sliding door. We build it from a simple wooden frame that is filled with rigid foam panels. We use truck tarpaulin again from the outside, and the vapor barrier film is sufficient from the inside. We build running tracks with small aluminum U-profiles that are mounted on a beam frame. The sliding door moves on small rollers in the running track.


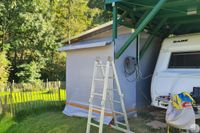
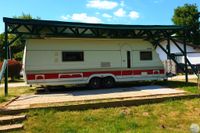
Now the caravan is back on its parking space. The lock is made from three OSB panels and coated with the floor covering. Set screws in the beam frame fix the panels with the help of wing nuts. This means that assembly and disassembly can be carried out quickly and easily at any time when the caravan is to go on tour.
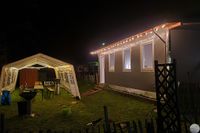
We install simple outdoor lighting, set up inside and complete the first part of the project by preparing a housewarming ceremony.


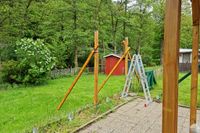
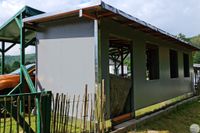
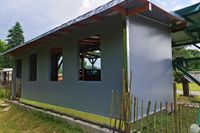
In the second part of the project, we build the shed on the side to store equipment and camping items. The design is similar to the awning. Here too, we place the scaffolding on screw-in sleeves and cover it with a heavy truck tarpaulin. The picket fence is still being implemented to allow access from the garden side. In fact, it is actually no longer necessary.